git archive --format=zip --prefix=root/ HEAD `git diff --name-only HEAD {コミットID}` -o diff.zip
めも。
git archive --format=zip --prefix=root/ HEAD `git diff --name-only HEAD {コミットID}` -o diff.zip
めも。
少しハマったのでめもします。
Youtube IFrame Player APIを使っていて、オリジナルデザインのボタンを1タップで再生したい。
ただし、Chrome や Safari などのモバイル ブラウザでは、HTML5
$('#オリジナルボタンセレクタ').click(function(){
    //PlayerをNEW
    var player = new YT.Player('{ELEMENT_ID}',{
        videoId:'{YOUR_VIDEO_ID}',
        playerVars: {
            autoplay: 1,
        },
        events:{
            //ONReadyしたら再生
            onReady:function(){
                player.playVideo();
            }
        }
    });
});
どうにもユーザーのマウスイベント経由だけど、ダメみたい。(間にイベントの非同期準備できなところが挟まるからかも?)
以下のようにすると解決しました。
//イベントの先にplayerをnew
var player = new YT.Player('ELEMENT_ID',{
    videoId:'YOUR_VIDEO_ID',
    playerVars: {
        autoplay: 0,
        enablejsapi:1,
    },
    events:{
        onReady:function(){
            //onReadyのところでボタンイベントを準備
            $('YOUR_BTN_ID').click(function(){
                player.playVideo();
            });
        },
        onStateChange:function(e){

        }
    }
});
たまにリダイレクトの設定などで大量のhtaccessを記載することがありますが、
その際にPHPStormのショートカット(Cmd + /)がとても便利。
sshしようとおもったら、
$ ssh username@xxx.xxx.xxx.xxx
Received disconnect from xxx.xxx.xxx.xxx: 2: Too many authentication failures
Disconnected from xxx.xxx.xxx.xxx
って怒られた。
$ ssh -o PreferredAuthentications=password username@xxx.xxx.xxx.xxx
ってパスワード認証を優先(PreferredAuthentications=password)すると繋がった。 passwordと鍵認証が有効だからなのかな?
かなりざっくりのメモ自分が思い出せるレベルです。(汗
Acl (アクセス – コントロール – リスト)
アクセスを制御するシステム全体の事を言っている。(学生規則リストみたいな)
具体的には ACLコンポネント全体と捉える。
ARO (アクセス – ロール:役割 – オブジェクト)
アクセスを制御する役割の種類(校長、先生、生徒、生徒etc)
具体的には arosテーブルで定義
ACO (アクセス – コントロール – オブジェクト)
アクセスする実際のアクションを定義していく
具体的には acosテーブルで定義
Allで使う。aros,caos,aros_acosの3つのテーブルの定義を以下のsqlを実行する。
/app/Config/Schema/db_acl.sql
public $components = array(
  'Acl',
  'Auth' => array(
    'authorize' => array(
      'Actions' => array('actionPath' => 'controllers')
    )
  ),
  'Session'
);
public $helpers = array('Html', 'Form', 'Session');
public function beforeFilter()
    {
        // AuthComponent の設定
        $this->Auth->loginAction = array(
            'controller' => 'users',
            'action' => 'login'
        );
        $this->Auth->logoutRedirect = array(
            'controller' => 'users',
            'action' => 'login'
        );
        $this->Auth->loginRedirect = array(
            'controller' => 'groups',
            'action' => 'index'
        );
        $this->Auth->allow();
    }
public function login()
{
  if ($this->request->is('post')) {
    if ($this->Auth->login()) {
      return $this->redirect($this->Auth->redirect());
    }
    $this->Session->setFlash(__('Your username or password was incorrect.'));
  }
}

public function logout()
{
}
<?php
echo $this->Form->create('User', array('action' => 'login'));
echo $this->Form->inputs(array(
    'legend' => __('Login'),
    'username',
    'password'
));
echo $this->Form->end('Login');
?>
public $actsAs = array('Acl' => array('type' => 'requester', 'enabled' => false));

public function parentNode()
{
  if (!$this->id && empty($this->data)) {
    return null;
  }
  if (isset($this->data['User']['group_id'])) {
    $groupId = $this->data['User']['group_id'];
  } else {
    $groupId = $this->field('group_id');
  }
  if (!$groupId) {
    return null;
  } else {
    return array('Group' => array('id' => $groupId));
  }
}

public function bindNode($user) {
  return array('model' => 'Group', 'foreign_key' => $user['User']['group_id']);
}


public function beforeSave($options = array())
{
  $this->data['User']['password'] = AuthComponent::password(
    $this->data['User']['password']
  );
  return true;
}
public $actsAs = array('Acl' => array('type' => 'requester'));
public function parentNode() {
  return null;
}
CRUDなものは準備しておいたほうが良いかも
最低限は groupのindexとaddメソッドGroup::save()で、じどうでarosに追加される
Console/cake bake all
で一旦CRUD作ってもいいかも。(一旦元のController,Model,View逃してとかも)
/groups/index
からグループ追加 > arosの追加を確認する
ここからプラグインで、次のURLからDL
https://github.com/sams/alaxos_acl
READMEを参考に
– git cloneして、
– フォルダ名を’alaxos_acl’ > ‘Acl’に
– Config/bootstrap.phpに、’CakePlugin::load(‘Acl’, array(‘bootstrap’ => true));’
– Acl/Config/bootstrap.phpを編集以下を編集 ‘Group’ と ‘group_id’部分
Configure :: write('acl.aro.role.model', 'Group');
と
Configure :: write('acl.aro.role.foreign_key', 'group_id');
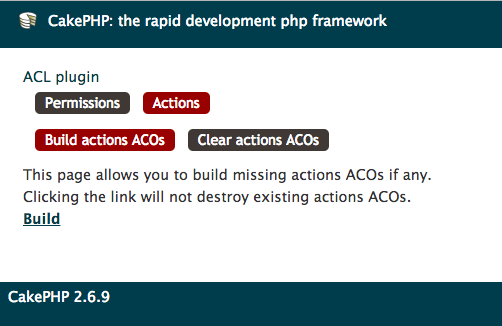
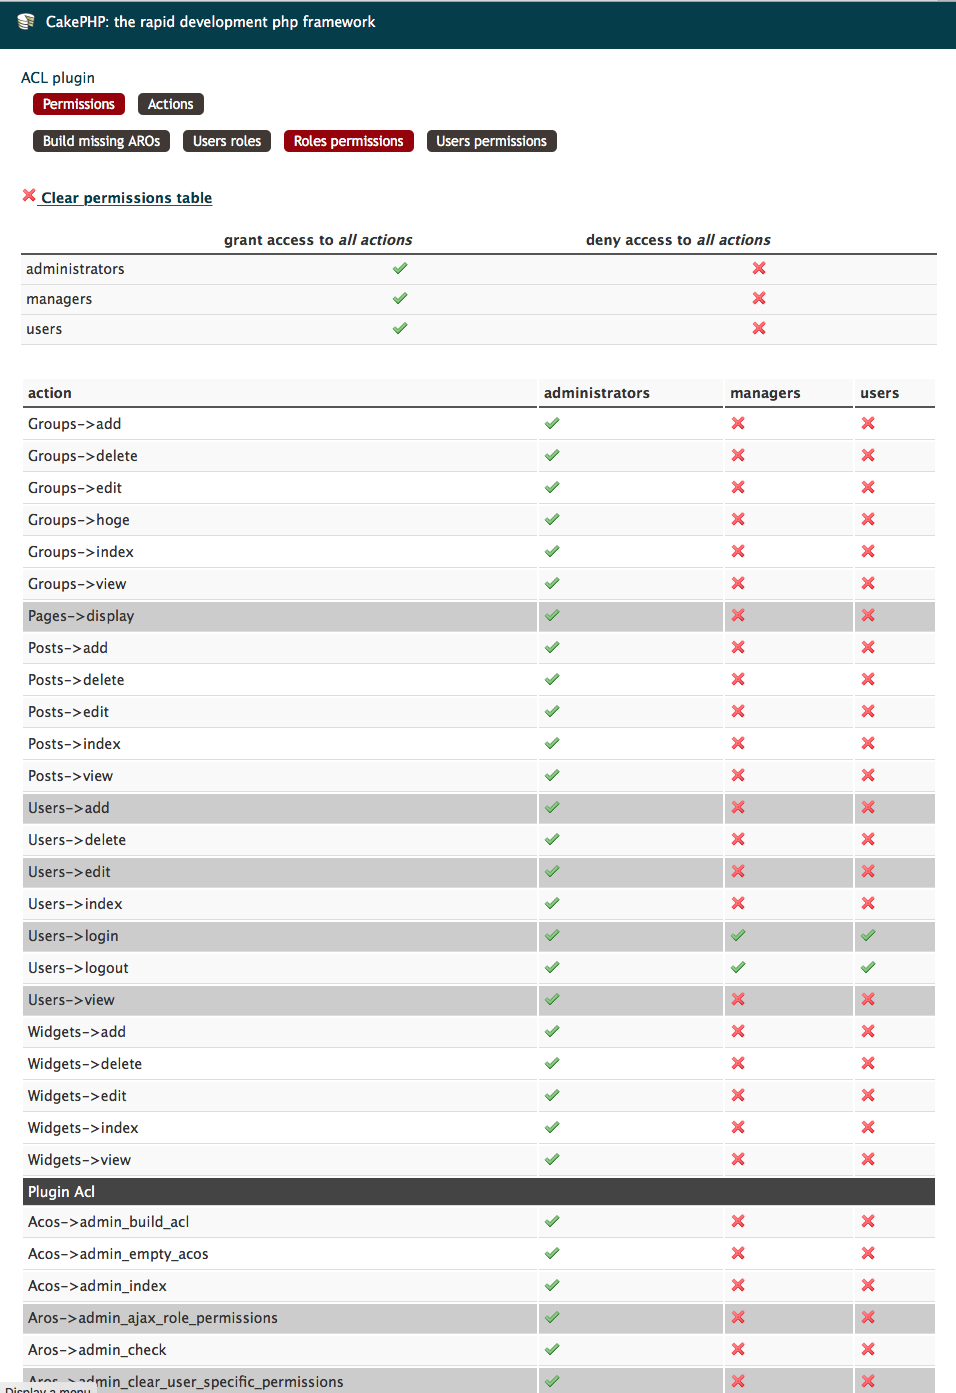
-[Permissions] > [Roles permissions]と押すと一覧が表示される。
適切に設定して後は AppControllerの $this->Auth->allor()を消して動作確認まで

LG モニター ディスプレイ 27UD68-W 27インチを1年前くらいに購入しました。
最初は金額で躊躇していたのですが、1年間つかってみてよかったので、以下いろいろと感じたところ。(アフィリンク貼っています。)
4Kなので単純にpxが倍なので、フルHD4枚分の情報が表示可能です。(なのでデュアルディスプレイからクラムシェルモードに切り替えて使ってます。)
例えば左側にエディタ(しかもHTML + PC用CSS + スマホ用CSS + JSなどを並列に!!)おいて、右側にBlisk(スマホ/PC)の表示を置くと、
画面の切り替えなどが不要になりました。
縦も2倍あるので、デベロッパーコンソールをPCの画面の下に表示したとしても十分な広さです。(デベロッパーコンソールのみでフルHD分をとれる。
これが一番大きいところで、いままで Cmd+Tab(Macのアプリ切り替えショートカット)で
ブラウザとエディタを切替えていただのですが、1画面内なので不要になります。
(1年間で押すであろう数万回のCmd+Tabを回避できたのでそれだけでも嬉しい)
※Bliskのオートリフレッシュ機能をONにしておけば、保存して視線をずらすだけでそく表示の確認ができます。
細かい時間ですが、1年間とかんがえれば相当な時間を節約できていそうです。
(参考リンク)
Bliskのオートリフレッシュ機能の設定方法。ローカルファイルの編集でブラウザを自動更新。
http://nelog.jp/blisk-auto-refresh

これまでは MacbookProとフルHDディスプレイの環境だったのですが、購入をきっかけに、MacBookProのクラムシェルモードに切替えて利用しています。
いつも利用時にファンが回りっぱなしで動作が重い感じがしていたのがいくらか解消された気がします。
映り込みがすくなく、ほぼ1日、長時間コーディングをする私にとっては目に優しく嬉しいです。(macbookproは光沢ディスプレイ)
花火とか、宇宙とか、花とか4Kで見れるのがうれしいです。
もっと、4K,60fpsの動画などふえるといいなぁーライブの生配信とかも4kでみたい。
1年間は何の問題も無く使えているのですが、できれば5年〜10年nくらいはつかいたいなぁーと考えております。
まだ実際につかってないのでわからないですが、もってくれると嬉しいな。
冒頭の写真にうつっているもHHKB TypeS 無刻印も、10年くらいは使いたいと感がています。
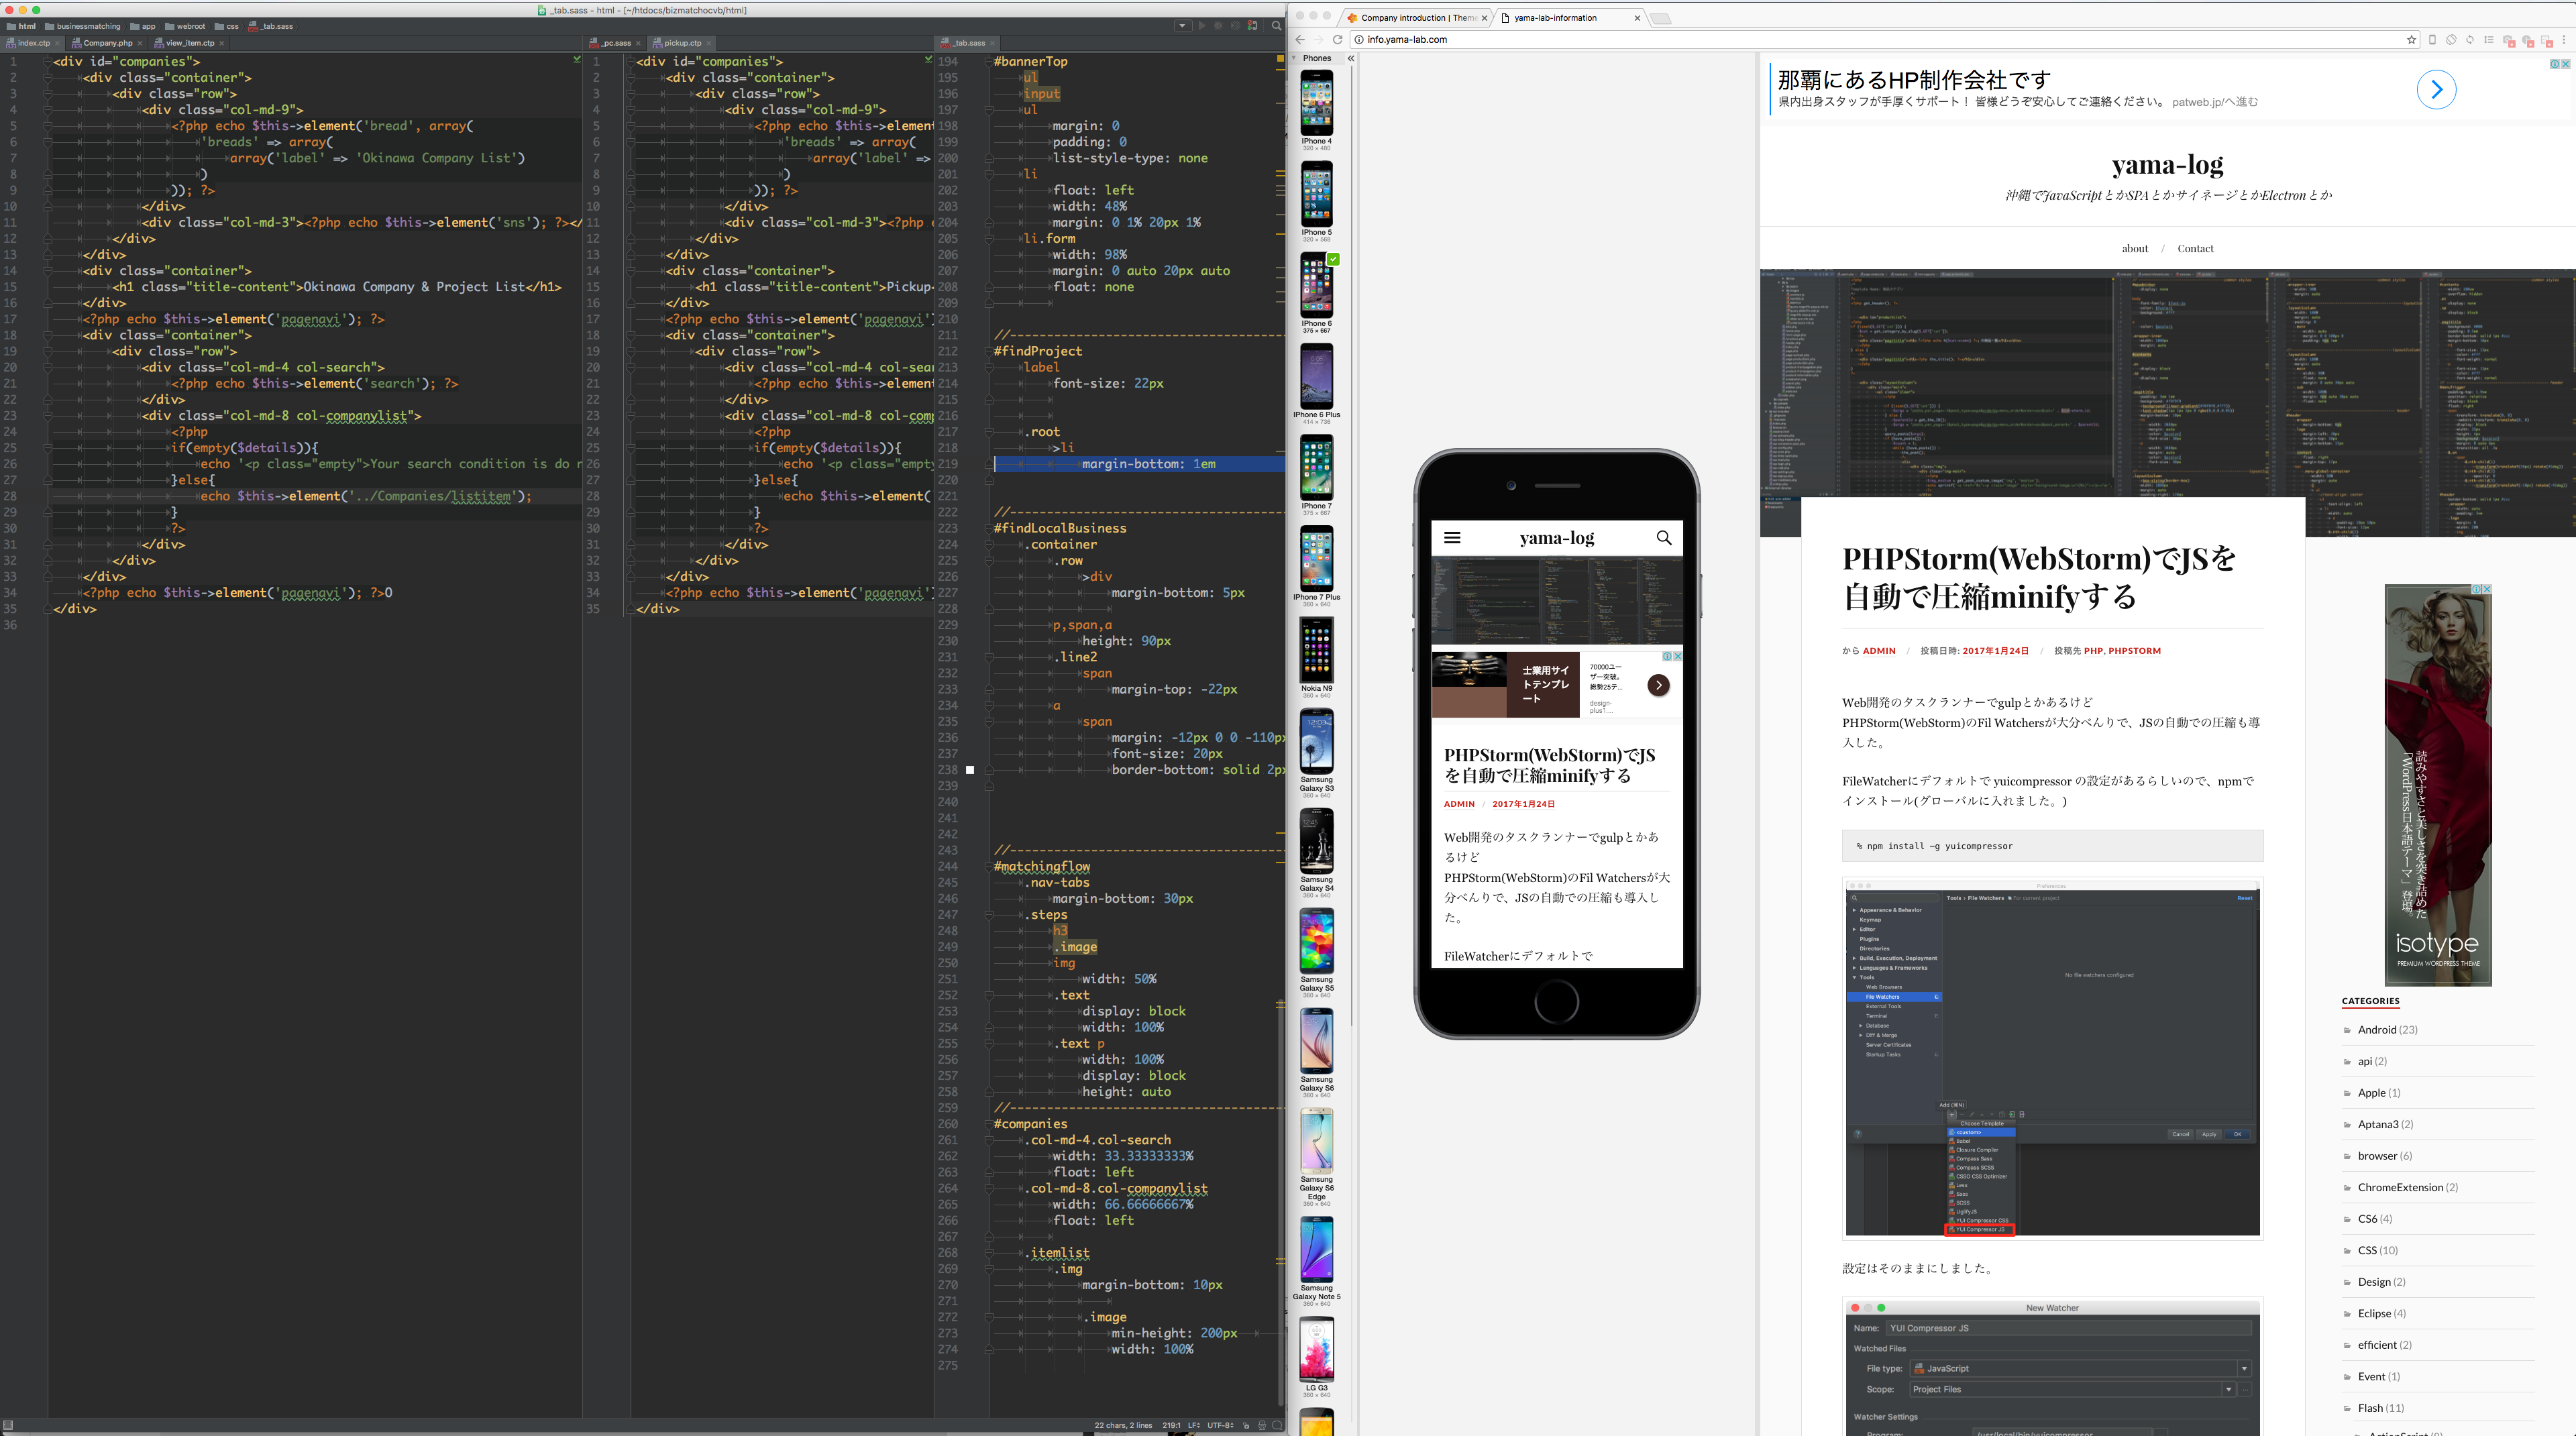
Web開発のタスクランナーでgulpとかあるけど
PHPStorm(WebStorm)のFil Watchersが大分べんりで、JSの自動での圧縮も導入した。
FileWatcherにデフォルトで yuicompressor の設定があるらしいので、npmでインストール(グローバルに入れました。)
% npm install -g yuicompressor
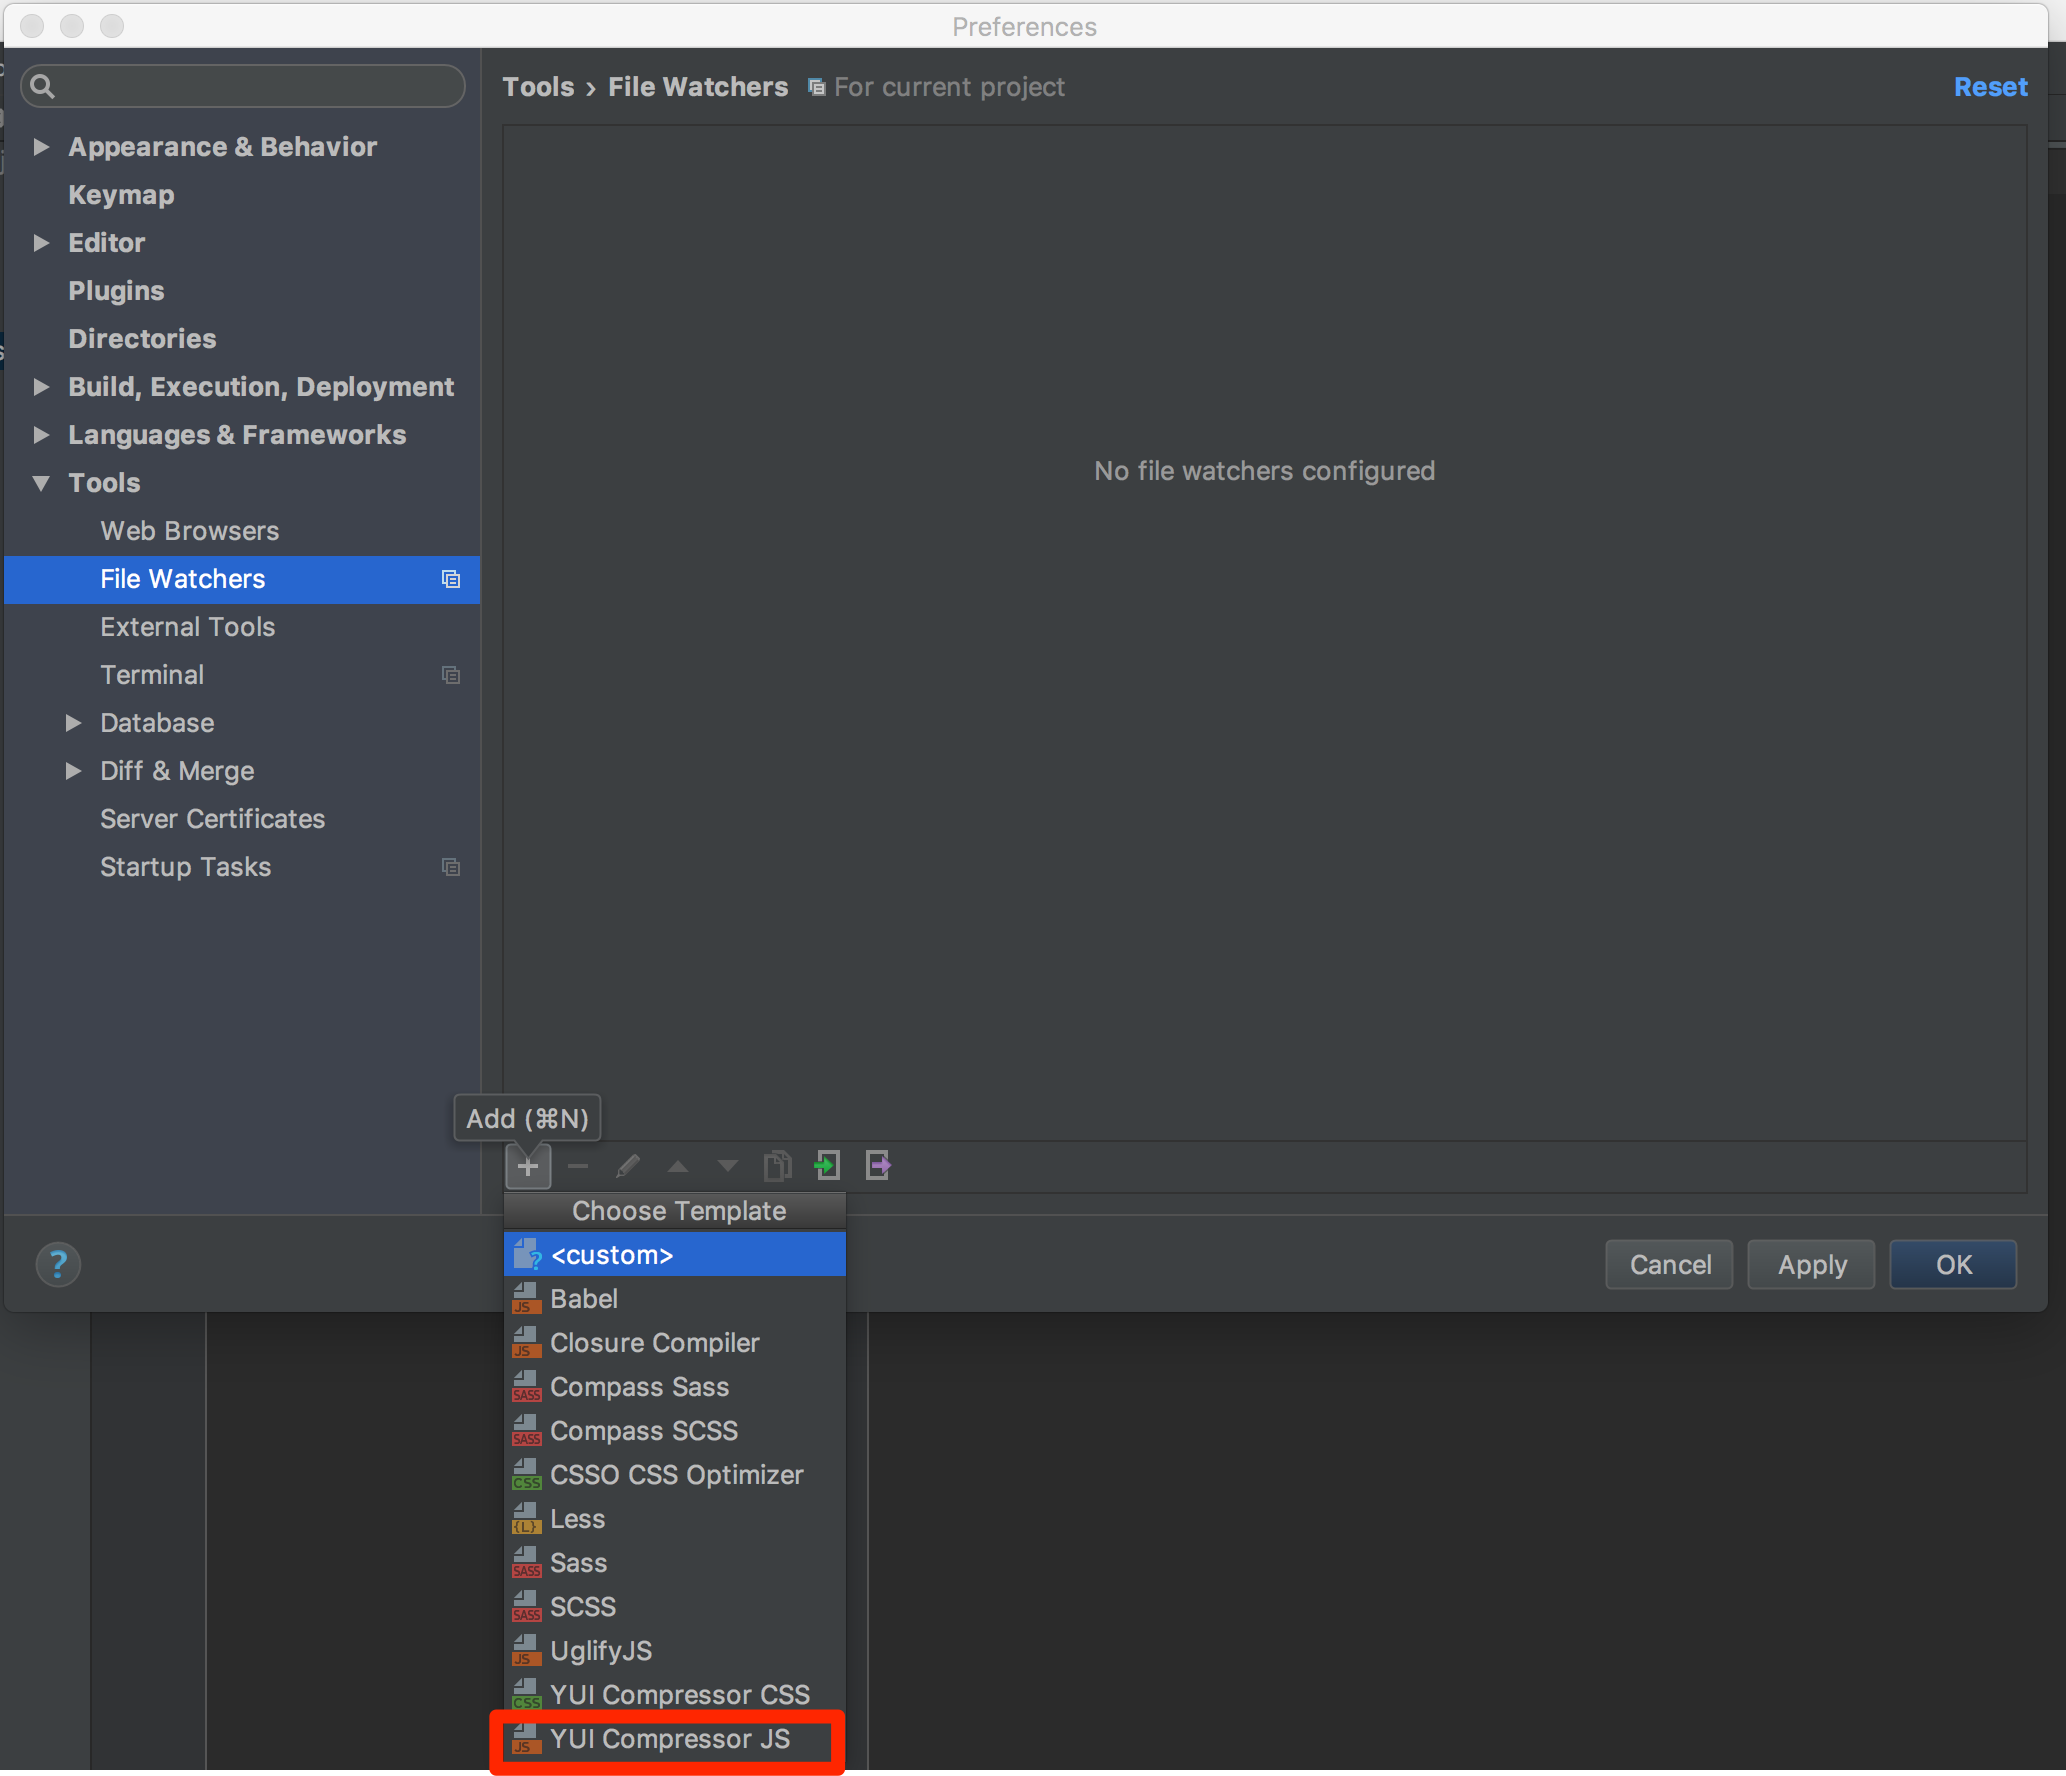
設定はそのままにしました。
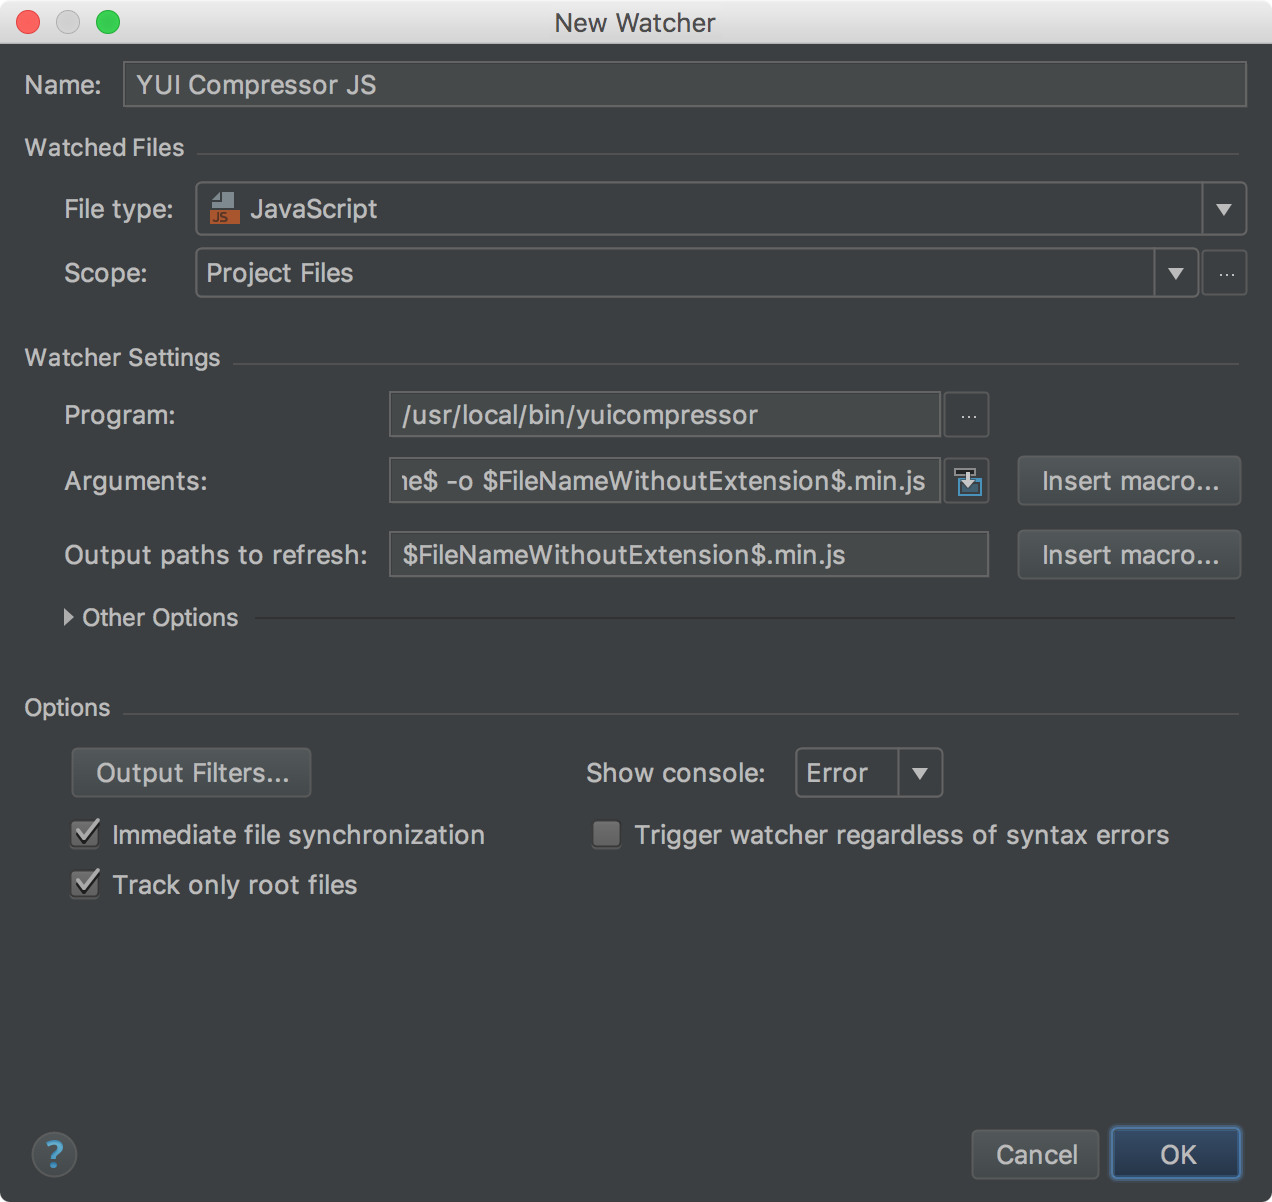
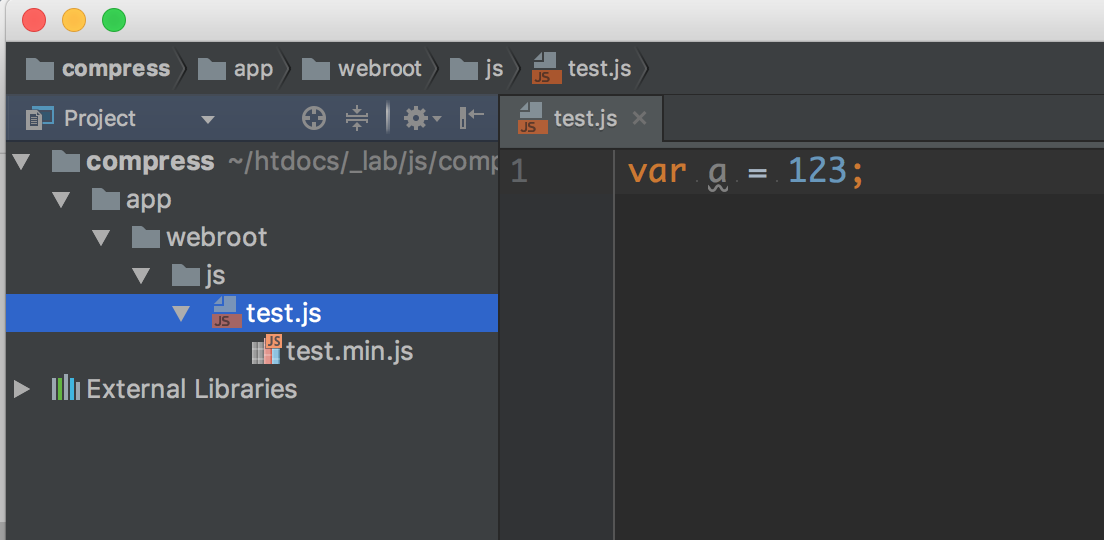
試しに適当ななJSファイルを作ってみたら自動で圧縮ファイルができました。
ファイル名.min.js
と ‘min’を付加して保存してくれるみたい。
コードを書きながらどんどん自動でいってくれるみたい、

JSに関してはリアルタイムでなくてもよいのかなぁーとかも考でしたが、
FileWatcherは、TypeScriptなども簡単にWatchできるのでとても便利です。
一番うれしいのは、環境の設定などきにせず、GUIでちゃっと設定できるので便利。
ただ共同作業で進めるときはちゃんとタスクランナーの設定かかなきゃ。><
いつも忘れてるのでメモ

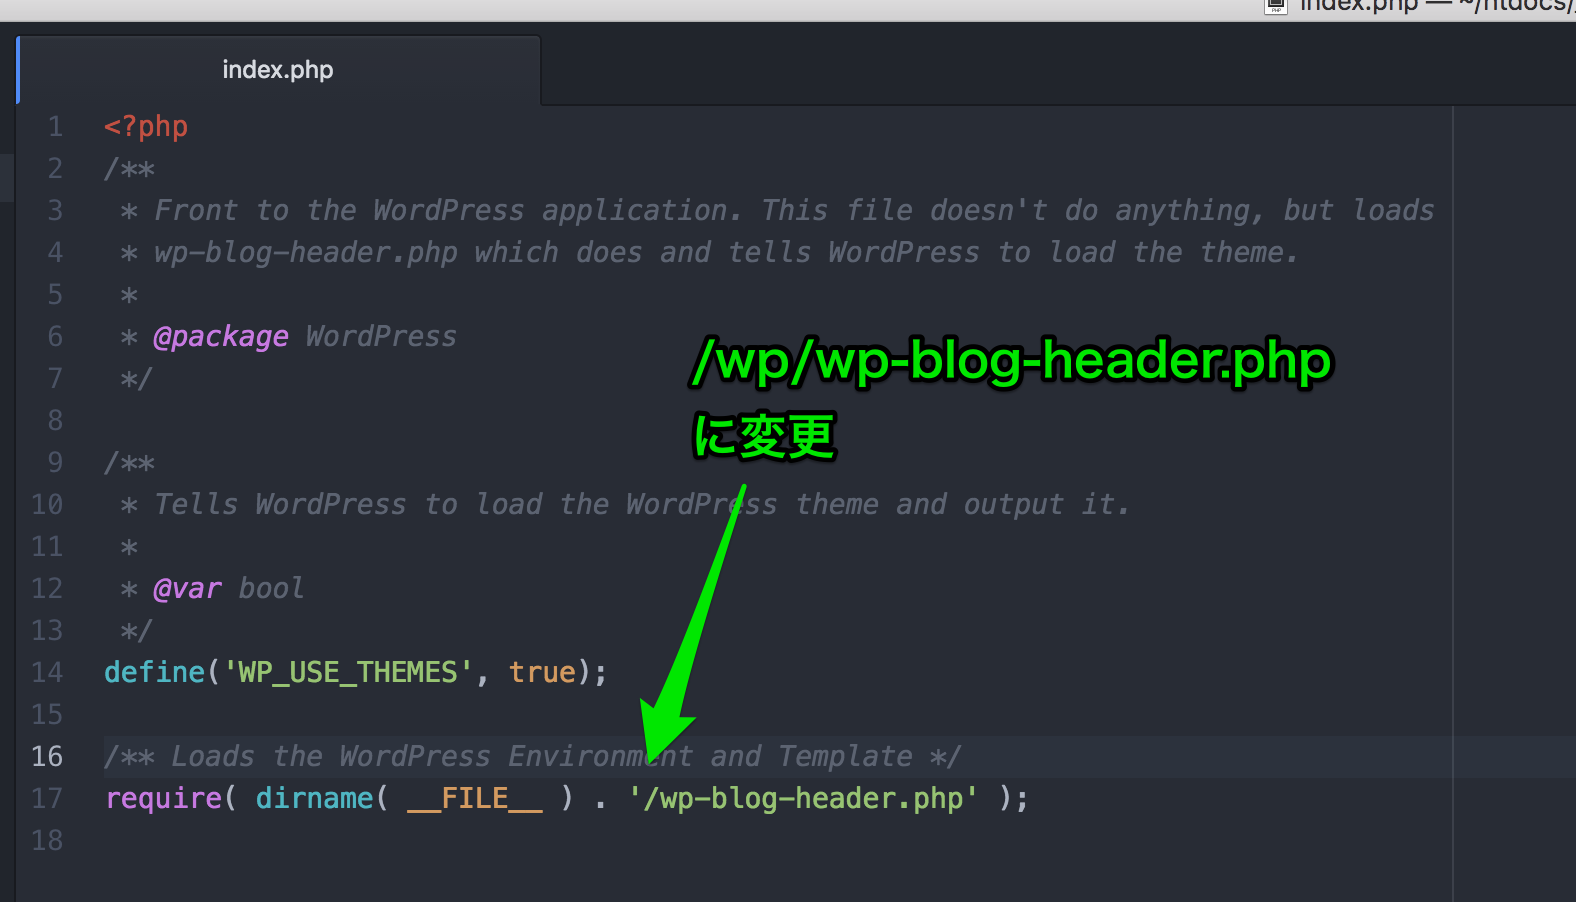
(この時点で管理画面が表示できなくなるけど落ち着く。)
WordPressのファイル群を/wp/以下などに一式移動します。
個人的にわすれるので。
$ ./Console/cake schema generate -f
$ ./Console/cake Migrations.migration run all -p Migrations
‘schema_migrations’テーブルができる。
テーブル追加など
$ ./Console/cake Migrations.migration generate -f
実行すると
Cake Migration Shell
---------------------------------------------------------------
Do you want to compare the schema.php file to the database? (y/n)
[y] >
schema.phpと比較するかな? > y
---------------------------------------------------------------
Comparing schema.php to the database...
Do you want to preview the file before generation? (y/n)
[y] >
previewする? y
Please enter the descriptive name of the migration to generate:
> add_newtable_and_newfields
Generating Migration...
説明する名前つけてなので変更した内容を記述 > add_newtable_and_newfields
Do you want to update the schema.php file? (y/n)
[y] >
スキーマupdate ? yes.
Welcome to CakePHP v2.6.12 Console
---------------------------------------------------------------
App : app
Path: /Users/taka/htdocs/bizmatchocvb/html/businessmatching/app/
---------------------------------------------------------------
Cake Schema Shell
---------------------------------------------------------------
Generating Schema...
Schema file exists.
 [O]verwrite
 [S]napshot
 [Q]uit
Would you like to do? (o/s/q)
[s] > o
Schema file: schema.php generated
上書き? yes で完了。
$ ./Console/cake Migrations.migration generate -f
で良さそう。
$ ./Console/cake Migrations.migration run
とすると
Cake Migration Shell
---------------------------------------------------------------
Available migrations:
  [xxxxxxxxxxx] xxxxxxxxxxx_add_newtable_and_newfields
        not applied
---------------------------------------------------------------
Please choose which version you want to migrate to. [q]uit or [c]lean.
> xxxxxxxxxxx
バージョンを聞いてくる。ので該当の xxxxxxxxxxx を入力して
---------------------------------------------------------------
Running migrations:
  [xxxxxxxxxxx] xxxxxxxxxxx_add_newtable_and_newfields
      > Creating table "bookmarks".
      > Creating table "likes".
      > Creating table "messages".
      > Creating table "notices".
      > Creating table "projects".
      > Adding field "newstype_id" to table "news".

---------------------------------------------------------------
All migrations have completed.
/Config/Migrations/以下のMigrationのプログラムに追記
‘up’した時にどうするかを追記。(‘down’のときも必要)
/**
 * After migration callback
 *
 * @param string $direction Direction of migration process (up or down)
 * @return bool Should process continue
 */
    public function after($direction) {
        if ($direction === 'up') {
            $Group = $this->generateModel('Group');
            $Group->save(array(
                'Group'=>array('name'=>'海外エージェント','key'=>'agent')
            ));
        }
        return true;
    }
}
とりいそぎ機能だけ試してみたい、アプリケーション側へ集中したいということでMAMPでPHPからRedisを簡単につかう方法。
こちらからコンパイル済のredis.soを取得して
(使いたいPHPのバージョン ※マイクロバージョンが違う環境でも動作できました。)
panxianhai/php-redis-mamp
https://github.com/panxianhai/php-redis-mamp
MAMPアプリケーションの以下のディレクトリに配置
/Applications/MAMP/bin/php/php5.x.x/lib/php/extensions/no-debug-non-zts-200xxxxx
メニューの [File] / [Edit Template] / [PHP] [PHP(自分のバージョン) php.ini を選択し以下を追記(最後でもどこでも)
extension=redis.so
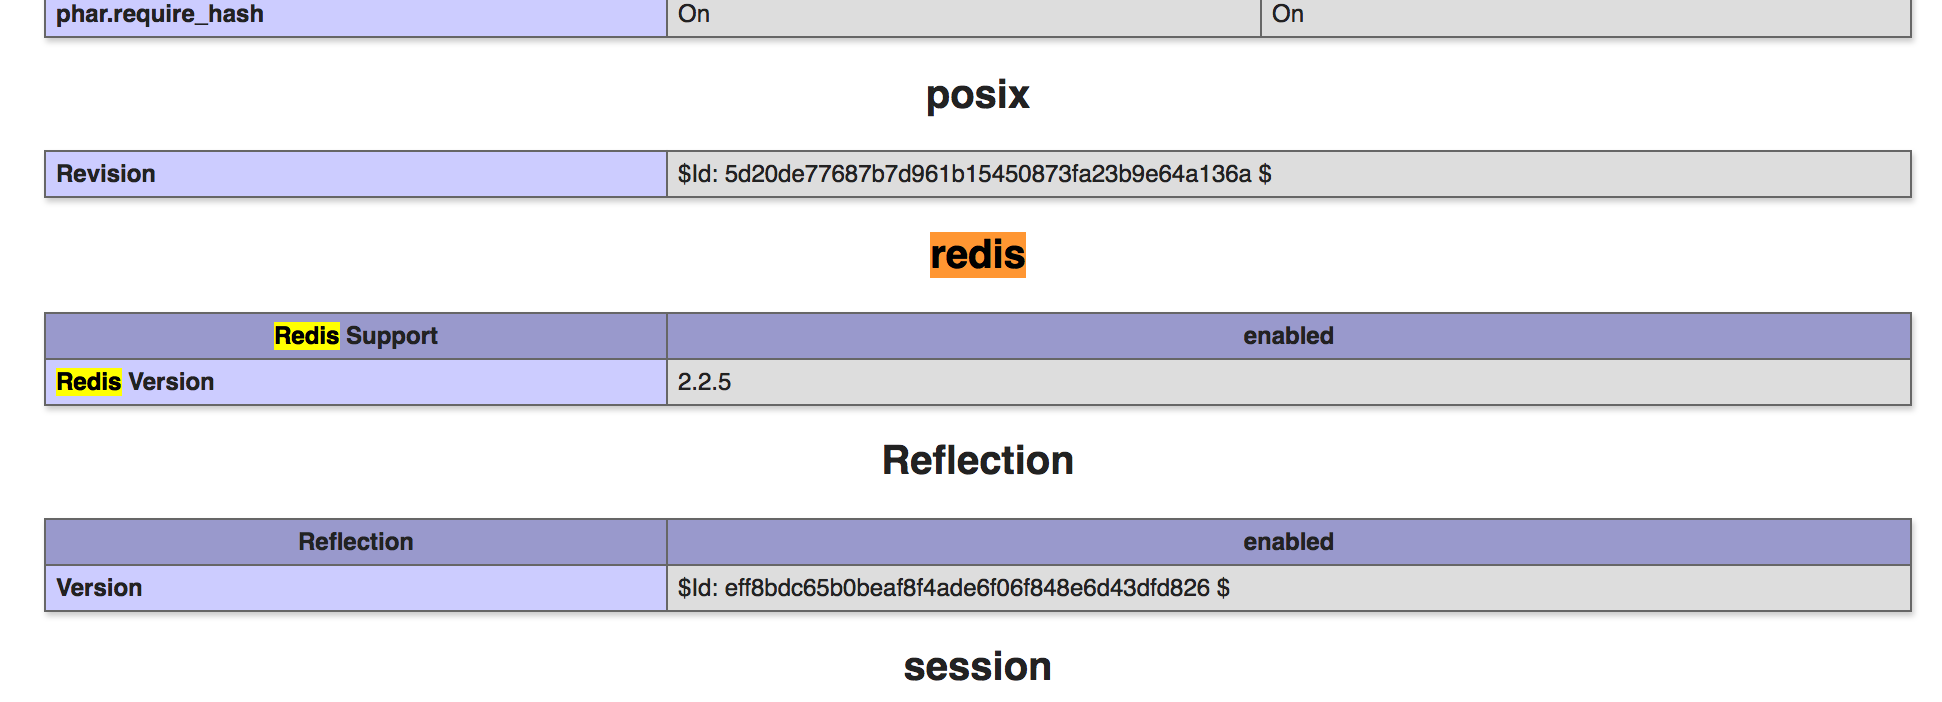
MAMPを再起動,phpinfo()してみる。(redisが出てたらOK)
brewでredisをインストール
$ brew install redis
redisを起動
$ redis-server
サンプル実行
<?php
$redis = new Redis();
$redis->connect("127.0.0.1",6379);
$redis->set("name","yamaaaaa");
echo $redis->get("name");
ブラウザでアクセスして出力確認
yamaaaaa
Powered by WordPress & Theme by Anders Norén

